Hello everyone, in this SAPUI5 tutorial we will learn about page navigation in SAPUI5 and SAP Fiori applications using Routing. Lets get started.
What is Routing in SAPUI5 and SAP Fiori?
Routing is a mechanism used to navigate between views in SAPUI5 and SAP Fiori applications. There are two main routing classes used for this purpose, they are
- sap.ui.core.routing.Targets
- sap.ui.core.routing.Route
In this tutorial we will learn how to use “sap.ui.core.routing.Targets”.
SAPUI5 Version required – 1.28
Step-by-Step Procedure
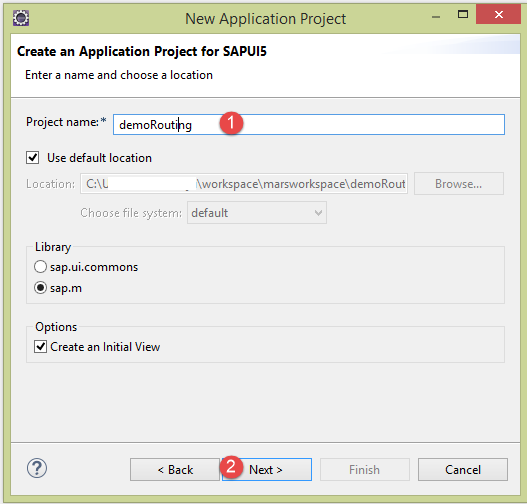
1. Create a new SAPUI5 Application Project in Eclipse IDE.
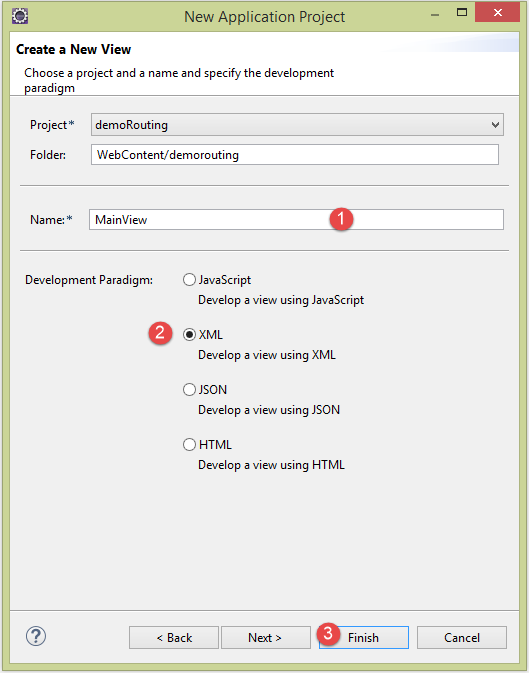
2. In the Create a New View window, provide the initial view name and choose the type of view as XML.
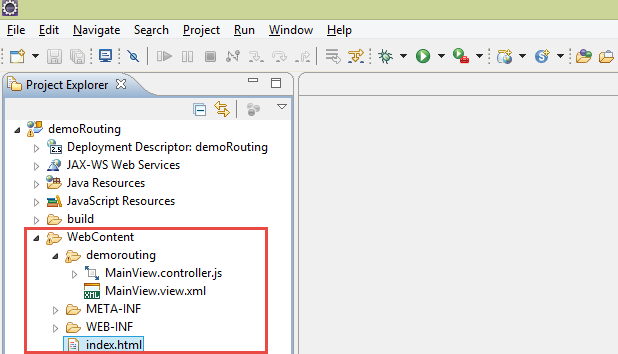
3. Now application structure will like below.
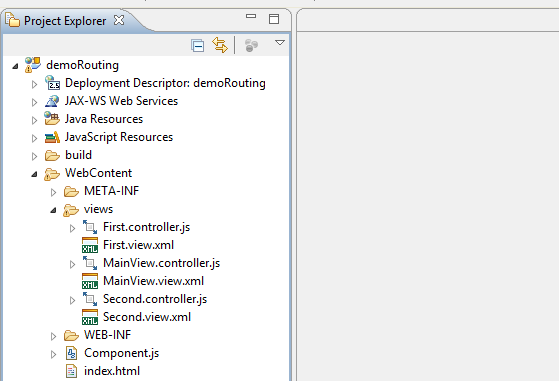
4. As we require two views to demonstrate view navigation, create two views in the same way.Create a new folder to move all views into this folder, as this a best practice to have all views in one place.
5. Now the application structure will look like below.
6. Go to the First view and add Text , a button to navigate to second view and Go to the second view, add Text.Below is the code for both views First.view.xml and Second.view.xml.
First.view.xml
<core:View xmlns:core="sap.ui.core" xmlns:mvc="sap.ui.core.mvc"
xmlns="sap.m" controllerName="demorouting.views.First">
	<Page title="Page-1">
		<content>
			<Text xmlns="sap.m" text="I am in Page-1">
			</Text>
			<Button xmlns="sap.m" text="Go to Page-2" press="onPress">
			</Button>
		</content>
	</Page>
</core:View>
Second.view.xml
<core:View xmlns:core="sap.ui.core" xmlns:mvc="sap.ui.core.mvc"
	xmlns="sap.m" controllerName="demorouting.views.Second">
	<Page title="Page-2" showNavButton="true" navButtonType="Back"
                             navButtonPress="onBack">
		<content>
			<Text xmlns="sap.m" text="I am in Page-2">
			</Text>
		</content>
	</Page>
</core:View>
7. The configuration of the routing in maintained in a separate file called Component.js.So create a new file with the name “Component.js” and copy the below code.
jQuery.sap.declare("demorouting.Component");
sap.ui.core.UIComponent.extend("demorouting.Component", {

	metadata : {
		rootView : "demorouting.views.MainView",
		routing : {
			config : {
				targetsClass : "sap.m.routing.Targets",
				viewPath : "demorouting.views",
				controlId : "rootControl",
				controlAggregation : "pages",
				viewType : "XML"
			},
			targets : {
				page1 : {
					viewName : "First",
					viewLevel : 0
				},

				page2 : {
					viewName : "Second",
					viewLevel : 1
				}
			}
		}
	},

	init : function() {
	    sap.ui.core.UIComponent.prototype.init.apply(this, arguments);
	    this.getTargets().display("page1");
	},

});
8. Component.js file contains routing information with possible target of navigation.
9. As we have defined the routing, next would be implementing the “onPress” event on the first view to navigate to second view and “onPress” event in the second view to come back to first view. Go the controller of the First view and copy the below code.
//	onInit: function() {
//
//	},

	onPress: function(){
		this.getOwnerComponent().getTargets().display("page2");
	},
//	onBeforeRendering: function() {
//
//	},
//	onAfterRendering: function() {
//
//	},
//	onExit: function() {
//
//	}

});
//	onInit: function() {
//
//	},

	onBack: function(){
		this.getOwnerComponent().getTargets().display("page1");
	},
//	onBeforeRendering: function() {
//
//	},
//	onAfterRendering: function() {
//
//	},
//	onExit: function() {
//
//	}

});
10. display( ) is method in the routing class used to call the next page.
11. Main View and its controllers code is below. Main view just contains the App, its kind of holder for all the views.
<core:View xmlns:core="sap.ui.core" xmlns:mvc="sap.ui.core.mvc" xmlns="sap.m"
		controllerName="demorouting.views.MainView">
	<App xmlns="sap.m"  id="rootControl"/>
</core:View>
12. Final SAPUI5 project structure will look like below.
12. Save the project and run the index.html file to see the output. You should see First View with a text and button like below.
Congrats you have successfully learned about Page Navigation in SAPUI5 using Routing.
Please stay tuned to us for more SAPUI5 tutorials.Please feel free to comment and let us know your feedback. You feedback will keep us alive.
![]()


Comments are closed.