Hello everyone, in this tutorial we will see how to create a Split App in SAPUI5.
Split App control sap.m.SplitApp exists in sap.m library from SAP. When you want to display master and details we can use this to build the UI5 application.
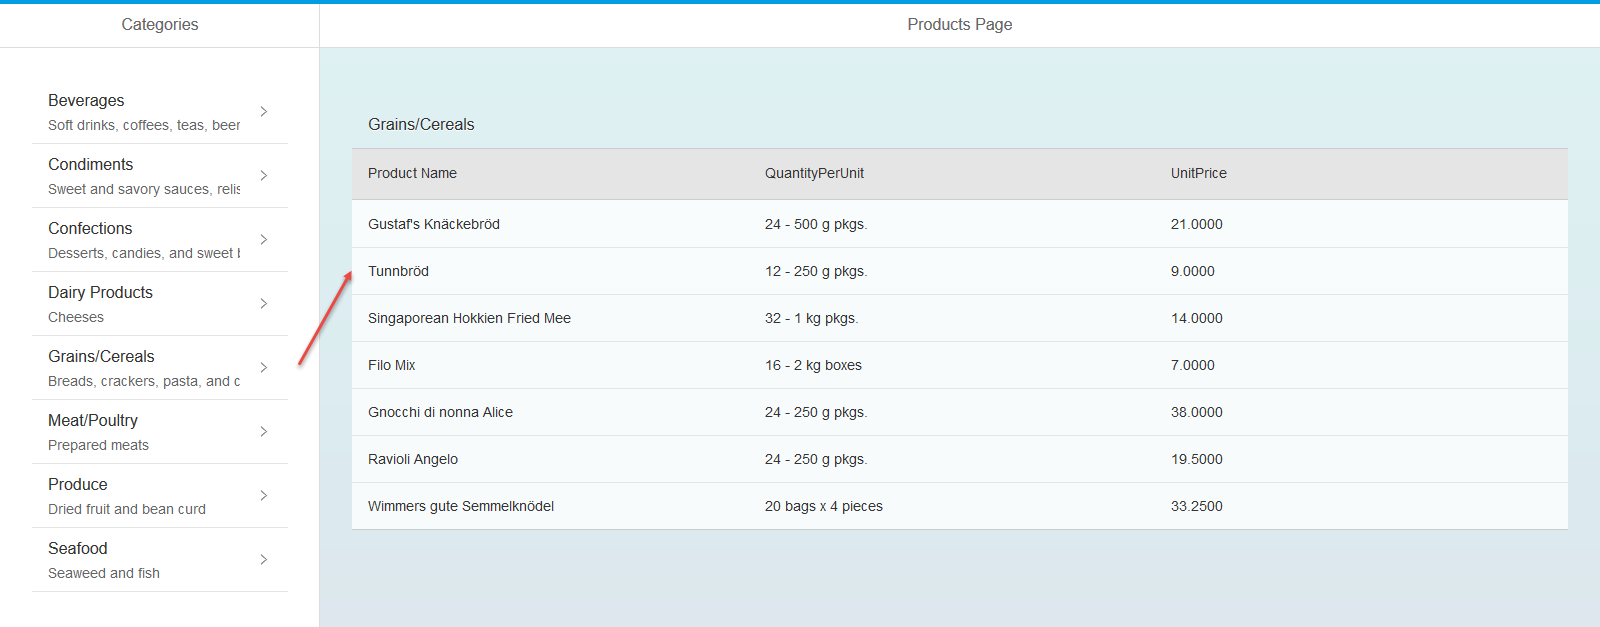
In this UI5 application we are displaying Product Categories in the Master Page and list of products of ta particular category will be displayed in the Detail Page. The output of the application is show in the below figure. Lets get started.
 Step-by-Step Procedure
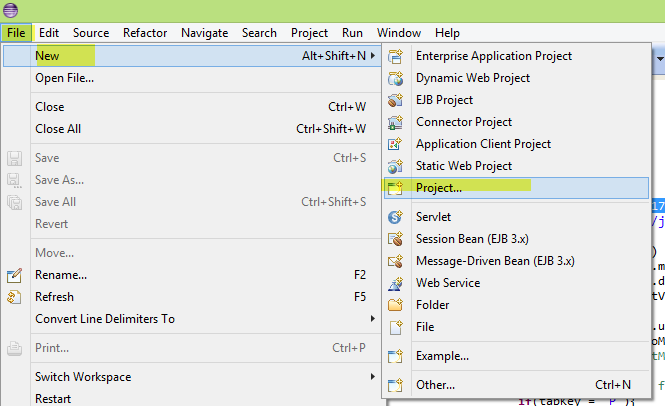
1. Create a new SAPUI5 Application project in Eclipse. By clicking File → New → Project and choose SAPUI5 application development project.
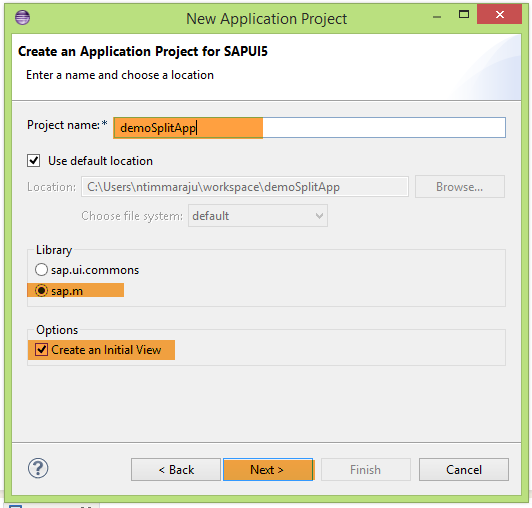
 2. Enter the Project Name and choose sap.m Library. Leave “Create an Initial View” check-box selected, as we want an initial view to be created by default. Click on Next.
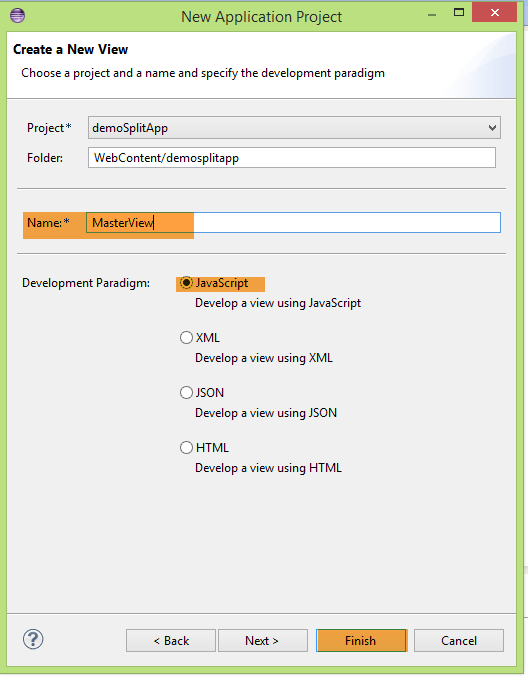
 3. Enter the View name and choose development paradigm as “JavaScript”.
UI5 applications are easy to develop by using JavaScript development paradigm and we also choose the same on our demo application. Click on Finish button for a new SAPUI5 application to be created.
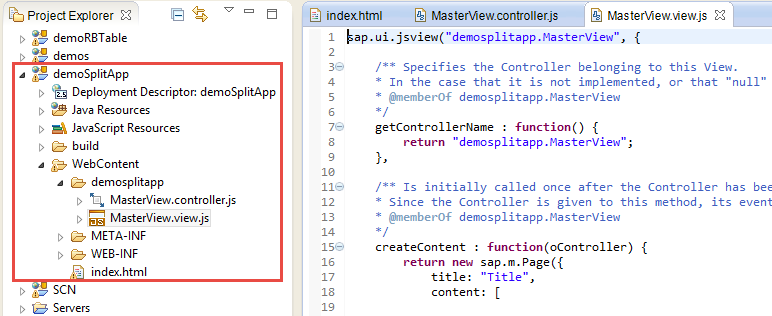
 4. In the Project Explorer, our new project “demoSplitApp” has been created. If you expand the project and go to WebContent → demosplitapp here you can see a default view and controller got created.
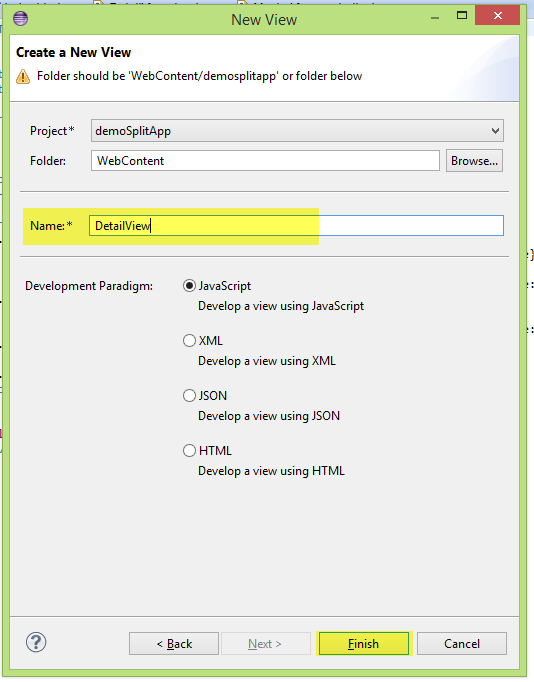
 5. Apart from the default view which is Master View ,we need one more view to display list of products, create a new view and name it “DetailView”. To create a new view navigate to New → Other or press Cntrl+N and choose View under the SAPUI5 Application project.
 6. Now two views are ready, go to “index.html” and add the two views using sap.m.SplitApp.You can find the “index.html” under WebContent folder of application project.Copy paste the below code in the index.html.
 olistCatgery =  new sap.m.List("idHdr", {
			includeItemInSelection : true,
			inset : true
		}):
9. As we have created a list, we need to have template of the list to add the data to the list.Create a template like below. Here we are using sap.m.StandardListItem as the template of the list.
oTemplate = new sap.m.StandardListItem("idItems", {title : "{CategoryName}",
			   description: "{Description}",
				   type : sap.m.ListType.Navigation,
					  });
10. Add the above create template instance as template to the List by using the below code and bind the data to the list by using “bindAggregation”.
olistCatgery.bindAggregation( "items", {
			 path : "/value",
			 template: oTemplate

		});
11. Now add the list to the Page content to be displayed in the page by using the below code.
 		return new sap.m.Page({
			title: "Categories",
			content: [
			olistCatgery
			]
		});
12. By this our Master Page is ready with design, lets run the application and see how it looks like.
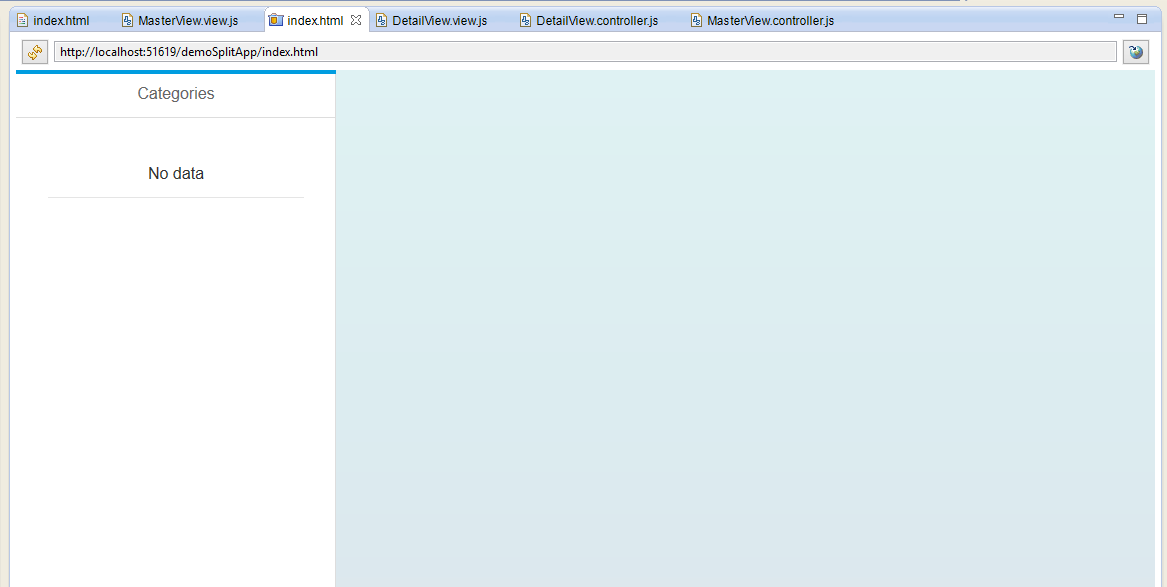 13. As you can see there is not data in the list so our next step would populating the data in the list.To do so got the Master View controller and write the below code in onInIt( ) method.
var sUrl = "http://services.odata.org/Northwind/Northwind.svc/Categories";
var omodel = new sap.ui.model.json.JSONModel(sUrl);
sap.ui.getCore().byId("idHdr").setModel(omodel);
14. We created a JSON model and pass the url of the OData service to get the list the product categories and then set the model to the list by calling setModel( ) method.
15. Now again run the application you should be able to see the data in the list.
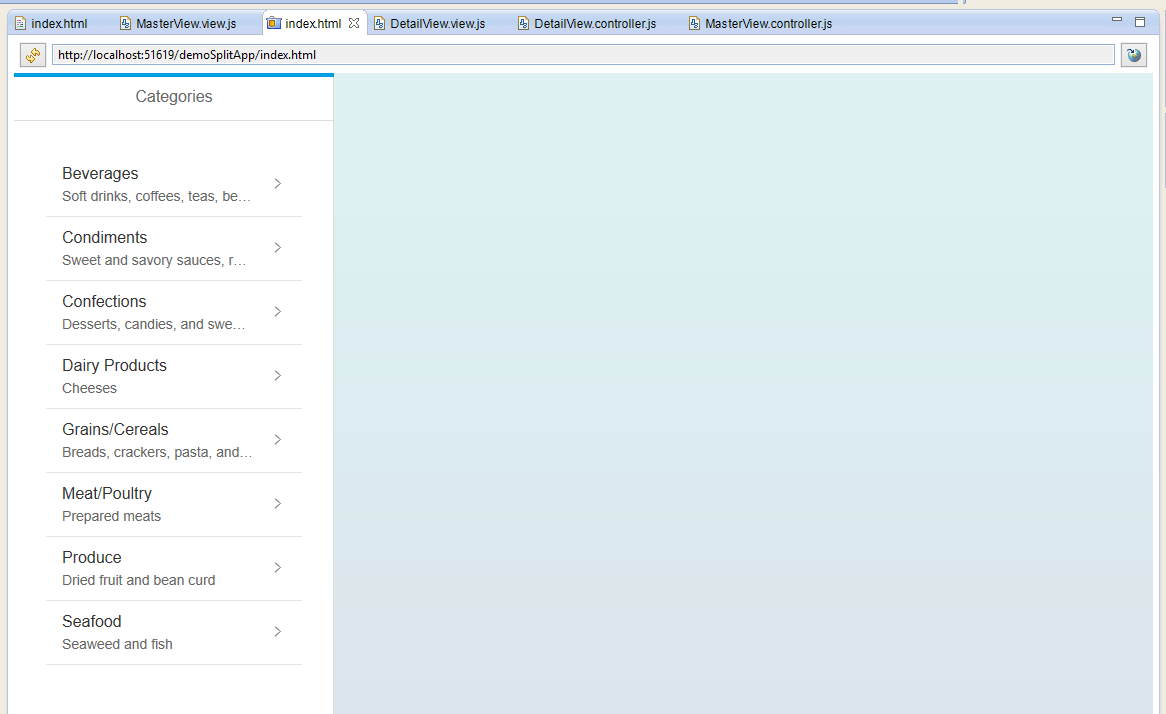
Now our designing of master page is done.
In the next tutorial we will design the detail page and add select event to the list to get the list of products of a selected category and display the list on the detail page in a table.
Please stay tuned to us for more SAPUI5 tutorials.Please feel free to comment and let us know your feedback.


Comments are closed.